I’m so glad you’ve decided to dive into the delicious world of pierogies. Whether you’ve got a bag of frozen ones stashed away in your freezer or you’re starting from scratch with fresh dough, I’ve got your back.
Pierogies, those delightful pockets of dough filled with all sorts of yummy fillings, have been a favorite in many households for generations.
But if you’re unsure about how to get them from that frozen state to a mouth-watering feast, or if you’re just looking to perfect your fresh pierogi game, you’ve come to the right place. I’ll walk you through the steps to ensure your pierogies are cooked to perfection every single time.
So, grab your apron, and let’s get cooking.
The Pierogi Primer
A brief introduction to the world of pierogies, understanding their origin, and the variety they come in.
History and Origin
Pierogies, or “pierogi” in singular, trace their roots to Central and Eastern Europe. While their exact origin remains debated, Poland often gets the spotlight for popularizing them. These dumplings, traditionally stuffed with fillings like potato, cheese, and meat, have been a staple in Slavic cuisine for centuries.
Celebrations like weddings and holidays often feature them, symbolizing prosperity and good luck.
Types and Fillings
The beauty of pierogies lies in their versatility. While potato and cheese (often called “Ruskie”) are the most popular, these dumplings can be filled with a myriad of ingredients. From savory options like mushrooms, meat, and spinach to sweet fillings like fruits and sweet cheese, the possibilities are endless.
Different regions have their unique spins, making the pierogi landscape rich and diverse.
Preparing the Dough
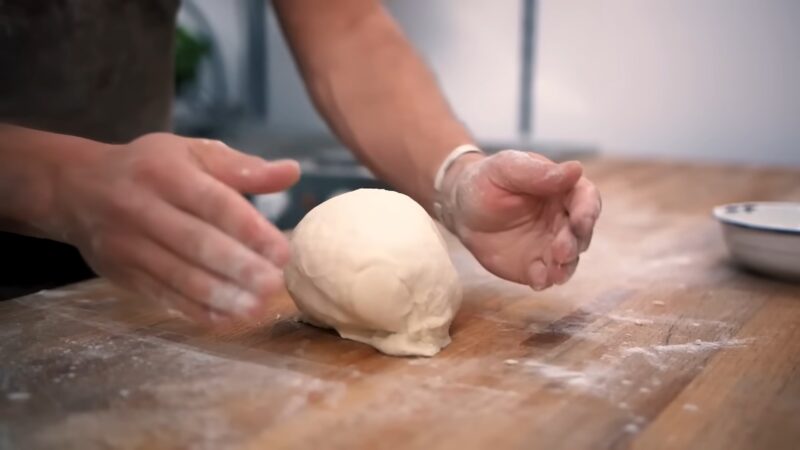
The foundation of any good pierogi is its dough. Achieving the right texture and consistency is crucial for a delightful outcome. For a basic pierogi dough, you’ll need flour, warm water, a pinch of salt, and sometimes an egg. The key is to strike the right balance.
Typically, for every two cups of flour, you’d use about half a cup of warm water. The egg, while optional, gives the dough a richer texture and color. Some variations might include a dash of sour cream or butter for added richness. Once your ingredients are combined, the real magic begins.
Kneading is essential to develop the gluten in the flour, ensuring your dough is elastic and pliable. Spend a good 10-15 minutes kneading until smooth. After this, let your dough rest for at least 30 minutes. This resting phase allows the gluten to relax, making the rolling process easier and the final product more tender.
Filling and Shaping
Now that we have our dough ready, it’s time to delve into the art of filling and shaping these delightful pockets.
Preparing the Filling
| Type of Filling | Key Consideration | Preparation Tips | Additional Ingredients |
|---|---|---|---|
| Savory | Consistency | Ensure the filling is neither too wet nor too dry | Combine with cheese, sautéed onions, or herbs as desired |
| Potato-based | Texture | Mash potatoes well, ensuring no lumps remain | Can be combined with cheese, sautéed onions, or herbs |
| Sweet/Fruit | Texture Balance | Use a mix of fresh and stewed fruits | Consider berries, apples, or cherries for variety |
The Art of Shaping
Roll out your rested dough on a floured surface until it’s about 1/8-inch thick. Using a round cutter or a glass, cut out circles. Place a spoonful of your prepared filling in the center, then fold the dough over, forming a semi-circle. Press the edges firmly, sealing them.
You can use a fork to create decorative ridges. Ensure there are no air bubbles, as these can cause the pierogies to burst during cooking.
Cooking Techniques
The method you choose to cook your pierogies can greatly influence their texture and flavor. Let’s explore the most popular techniques.
The Traditional Method
- Preparation:
- Boiling is the most traditional method of cooking pierogies.
- Ensure you have a large pot and a slotted spoon ready.
- Cooking Process:
- Fill the pot with water and add salt.
- Bring the salted water to a boil.
- Once boiling, gently add the pierogies one by one.
- Be careful not to overcrowd the pot to ensure even cooking.
- Monitoring:
- Observe that the pierogies will initially sink to the bottom.
- Wait for them to float to the surface, indicating they are cooked. This usually takes about 2-3 minutes.
- Post-Cooking:
- Use a slotted spoon to remove the pierogies from the water.
- Transfer them to a tray, placing them in a single layer.
- Ensure they don’t overlap to prevent them from sticking together.
For a Crispy Finish
- Preparation:
- After boiling, pierogies can be given a crispy finish for added texture and flavor.
- Ensure you have a skillet and the necessary ingredients like butter or oil.
- Cooking Process:
- Place the skillet on the stove and set to medium heat.
- Add butter or oil to the skillet.
- Wait until the butter or oil is hot and shimmering.
- Frying the Pierogies:
- Carefully place the boiled pierogies into the skillet.
- Cook them until they’re golden brown on one side.
- Flip and ensure the other side is also golden brown.
- Enhancing Flavor:
- The crispy finish adds a delightful crunch to the pierogies.
- For an intensified flavor, consider pairing with sautéed onions or bacon bits.
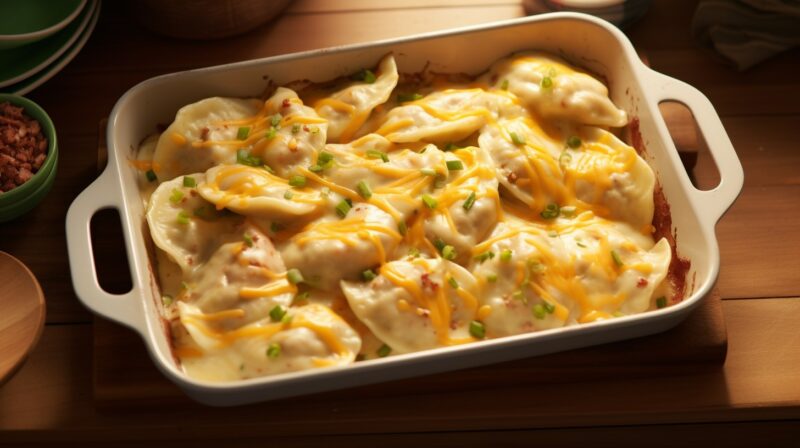
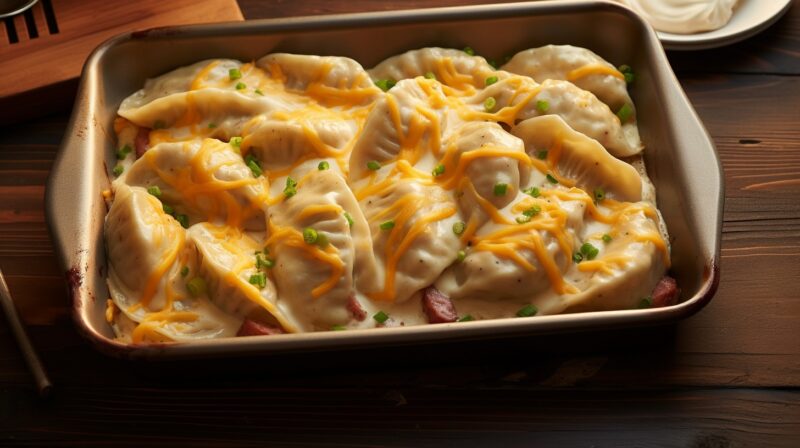
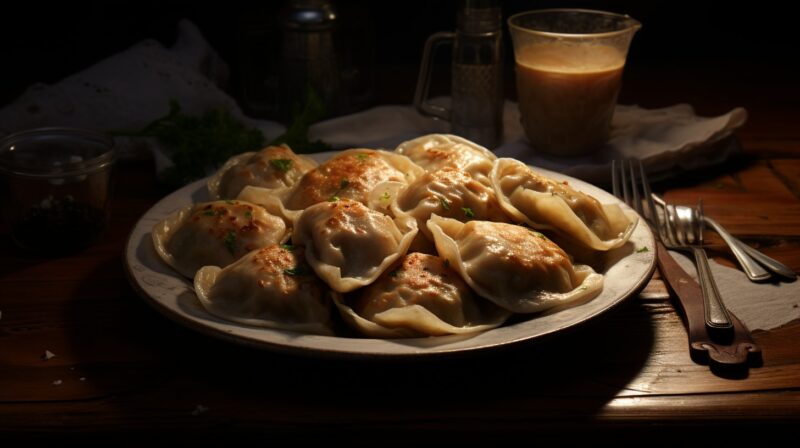
Serving and Pairing

A well-cooked pierogi is a delight in itself, but the right accompaniments can elevate the experience.
Traditional Accompaniments
In many Central and Eastern European households, pierogies are traditionally served with sour cream. The tanginess of the sour cream complements the richness of the pierogi fillings. Sautéed onions, crispy bacon bits, and a sprinkle of fresh herbs like dill or parsley can enhance the flavors.
For sweet pierogies, a dusting of powdered sugar or a dollop of fresh cream works wonders.
Beverage Pairings
When it comes to drinks, pierogies offer a versatile pairing range. For savory versions, consider light beers or white wines like a crisp Chardonnay. If you’re indulging in sweet pierogies, dessert wines or even a cup of black tea can be a delightful companion.
Storing and Reheating
Whether you’ve made a big batch or have leftovers, knowing how to store and reheat pierogies can ensure they remain delicious.
Storing for Later
If you’re preparing pierogies in advance, you can store them uncooked. Place them on a tray, ensuring they don’t touch, and freeze. Once frozen, transfer them to a freezer bag or container. They can be stored this way for up to three months. Cooked pierogies can be refrigerated in an airtight container for up to three days.
Reheating to Perfection
To reheat cooked pierogies, pan-frying is the best method as it retains their texture and flavor. If they’re frozen and uncooked, there’s no need to thaw; you can boil them directly, extending the cooking time by a couple of minutes.
Common Mistakes and Solutions
Even seasoned cooks can sometimes face challenges when preparing pierogies. Let’s address some common pitfalls and their solutions.
Dough Troubles
If your dough is too sticky, it might be challenging to roll and shape. This can be due to too much water or not enough flour. Gradually add more flour until you achieve the desired consistency. Conversely, if the dough is too dry and cracking, sprinkle in a bit of water and knead until smooth.
Filling Spills
Overfilling can cause the pierogi to burst during cooking. Always use a conservative amount of filling, ensuring there’s ample space to seal the edges. If the filling is too wet, it can seep out and prevent a tight seal. Ensure your fillings are of a thicker consistency to avoid this.
FAQs
What sauces or toppings go well with pierogies?
Common toppings include sour cream, caramelized onions, bacon bits, and melted butter. The choice of sauce or topping can vary based on the filling and personal preference.
Are there gluten-free pierogi options?
Yes, many recipes use gluten-free flour blends to make the dough. Ensure you check the ingredients if purchasing them from a store.
What side dishes pair well with pierogies?
Pierogies pair well with sautéed vegetables, salads, sausages, or any protein of your choice. They’re versatile and can be incorporated into various meal plans.
How do I reheat leftover pierogies without making them soggy?
Reheating in a skillet over medium heat or in an oven at 350°F (175°C) will help retain their texture.
Are there any traditional beverages to serve with pierogies?
In many Eastern European cultures, pierogies are often enjoyed with beers, ciders, or even clear spirits like vodka.
Summary
Alright, folks, we went from the freezer to the feast with our pierogies, both fresh and frozen. Whether you’re boiling, frying, or baking them, the key is to keep an eye on them and ensure they’re cooked just right. Remember, the golden rule is to make sure they’re heated through and have that delicious, slightly crispy edge if you’re frying.
So, next time you get a craving, don’t be intimidated.