We’ve all been there. With eager anticipation, we place a bag of popcorn into the microwave, only to be distracted for a moment too long. The result? A burnt aroma that seems to cling to every corner of our kitchen, with the microwave bearing the brunt of this olfactory offense.
Burnt popcorn not only leaves behind an unpleasant taste but also an aroma that can linger for days, making every subsequent microwave use a reminder of that one oversight.
As someone who has faced this predicament more times than I’d like to admit, I was interested in finding the most effective ways to banish this stubborn smell.
Now, I want to share tried-and-true methods to rid your microwave of that pesky burnt popcorn odor, restoring its freshness and ensuring your culinary misstep becomes a distant memory.
Table of Contents
Toggle1. Deep Cleaning
Every microwave, new or old deserves a deep clean now and then. Over time, food particles and splatters accumulate, and these can contribute to unpleasant odors. A thorough cleaning can often make a significant difference.
- Materials Needed:
- Mild dish soap
- Soft cloth or sponge
- Water
- Steps to undertake:
- Steam with Water: Fill a microwave-safe bowl with water and heat it for 3-4 minutes. The steam will help soften any hardened spills or splatters.
- Apply Dish Soap: Dampen your cloth with soapy water and wipe down all interior surfaces. For stainless steel interiors, follow the grain to prevent streaks.
- Rinse and Dry: Using a clean cloth dampened with water, rinse off any soap residues. Dry the interior with a lint-free cloth.
2. Natural Cleaners

Nature provides some of the best cleaning agents. Both lemon and vinegar are acidic, which makes them excellent at breaking down grease and neutralizing odors.
- Materials Needed:
- Lemon juice or white vinegar
- Water
- Microwave-safe bowl
- Guide:
- Prepare the Solution: In a bowl, mix equal parts of water and lemon juice or vinegar.
- Heat and Steam: Place the bowl in the microwave and heat for 5-6 minutes. The steam will work in tandem with the natural cleaner to tackle odors.
- Wipe Down: Once done, carefully remove the bowl (it will be hot) and wipe down the microwave’s interior with a clean cloth.
3. Overnight Solutions
While immediate solutions are great, there’s something to be said for the effectiveness of treatments that work over time. Baking soda and activated charcoal are renowned for their odor-absorbing properties.
- Materials Needed:
- Baking soda or activated charcoal
- Small open container
- The Process:
- Prepare the Deodorizer: Fill a small container with baking soda or activated charcoal.
- Place in Microwave: Set the container inside the microwave and leave it overnight. Ensure no one uses the microwave during this time.
- Remove in the Morning: By morning, the deodorizer will have absorbed much of the odor. Remove the container and discard its contents.
4. Coffee Grounds

Most of us enjoy a good cup of coffee in the morning, but few realize the power that those leftover grounds have when it comes to odor removal. Let’s harness this aromatic powerhouse.
- Materials Needed:
- Used coffee grounds
- Shallow dish or plate
- Step-by-Step Guide:
- Prepare the Coffee Grounds: Once you’ve brewed your coffee, collect the used grounds and spread them out on a shallow dish or plate.
- Insert: Set the dish inside the microwave for 12-24 hours. The longer you leave it, the more effective it will be.
- Dispose of the Grounds: After the allotted time, remove the dish and dispose of the grounds. Your microwave should smell noticeably fresher.
5. Essential Oils
Essential oils are known for their therapeutic properties, but they can also be handy in odor removal, offering a pleasant scent in return. Introduction: From aromatherapy to skincare, essential oils have a myriad of uses. Their concentrated fragrances can be particularly effective in neutralizing stubborn smells, including those in microwaves.
- Materials Needed:
- Essential oil of choice (e.g., lavender, lemon, eucalyptus)
- Water
- Microwave-safe bowl
- How to go about it:
- Mix Water and Essential Oil: In a microwave-safe bowl, mix a few drops of your chosen essential oil with water.
- Microwave the Mixture: Heat the bowl for 5-6 minutes, allowing the steam to spread the fragrance.
- Wipe and Air Out: Once done, wipe down the microwave’s interior and leave the door open for an hour to let it air out.
6. Vanilla Extract
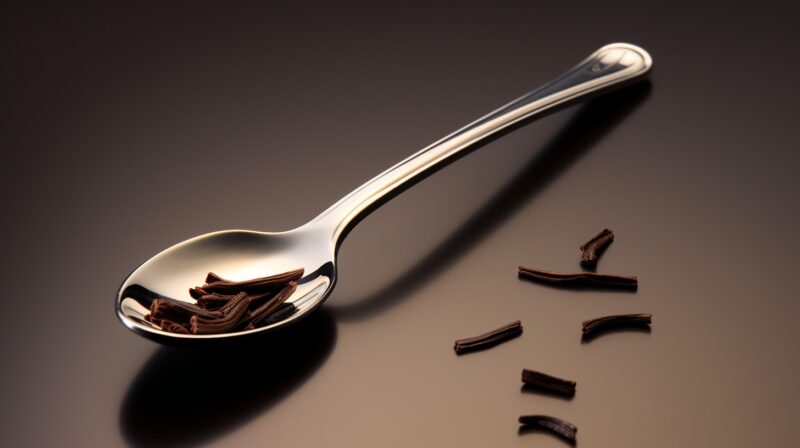
Vanilla has a universally loved scent, making it a popular ingredient in perfumes and air fresheners. Its pleasant and overpowering aroma can easily mask unwanted odors.
- Materials Needed:
- Vanilla extract
- Water
- Microwave-safe bowl
- Step-by-Step Guide:
- Prepare the Vanilla Solution: Mix a teaspoon of vanilla extract with a cup of water in a microwave-safe bowl.
- Heat the Mixture: Microwave the solution for 5 minutes. The resulting steam will be infused with the vanilla scent.
- Leave the Door Open: After microwaving, leave the microwave door open for a while, allowing the vanilla scent to permeate and neutralize the burnt smell.
7. White Bread and Vinegar
It might sound odd, but white bread and vinegar together can act as a sponge, drawing out that burnt smell from your microwave.
- Materials Needed:
- A slice of white bread
- White vinegar
- A shallow dish
- How to use them properly:
- Soak the Bread: Pour white vinegar into a shallow dish and soak the slice of white bread in it.
- Place it Inside: Set the dish with the vinegar-soaked bread inside the microwave.
- Leave Overnight: Let it sit overnight. The bread will act as a sponge, absorbing the odors, while the vinegar neutralizes them.
8. Apples: Nature’s Odor Neutralizer

Apples are not just for snacking. They can be a natural and effective way to tackle unwanted smells. The natural juices in apples can help in breaking down and neutralizing odors.
- Materials Needed:
- An apple
- Microwave-safe bowl
- Water
- Utilizing this method:
- Slice the Apple: Cut the apple into several pieces and place them in a bowl filled with a bit of water.
- Microwave the Apple: Heat the bowl for about 5 minutes.
- Let it Sit: After microwaving, don’t immediately remove the bowl. Instead, let it sit inside with the door closed for an hour or two. The steam from the apple slices will help combat the burnt smell.
9. Tomato Juice
Tomatoes have been used for ages to combat strong smells, even skunk odors! Their natural acidity can help break down and neutralize stubborn microwave smells.
- Materials Needed:
- Tomato juice
- Microwave-safe bowl
- How to use it:
- Prepare the Bowl: Pour tomato juice into a microwave-safe bowl.
- Heat the Tomato Juice: Microwave the bowl for about 5 minutes.
- Wipe Down: Once done, use a cloth or sponge to wipe down the interior. The combination of steam and tomato juice will help in removing the burnt smell.
10. Oats

Oats have a natural absorbent quality, making them effective in drawing out and trapping unpleasant aromas. This method is simple, yet it can be quite effective, especially for milder odors.
- Materials Needed:
- Raw oats
- Shallow dish
- Guide:
- Prepare the Dish: Pour raw oats into a shallow dish until it’s about half full.
- Put it Inside: Set the dish inside. Ensure it is turned off and remains unused during this process.
- Leave Overnight: Allow the oats to sit inside overnight. The oats will gradually absorb the odors, leaving your microwave smelling fresher by morning.
FAQs

How long does it typically take to get rid of the burnt popcorn smell in a microwave?
The duration can vary based on the method used and the intensity of the smell. Some methods, like steaming with lemon water or vinegar, can show immediate results, while others, like using baking soda or coffee grounds, might require leaving them in the microwave overnight for maximum effectiveness.
Why does the burnt smell persist even after cleaning the microwave multiple times?
Burnt popcorn smell can be particularly stubborn due to the oils and seasonings in the popcorn. It might require multiple treatments or a combination of methods to completely eliminate the odor.
Can the burnt popcorn smell affect the taste of other foods I microwave afterward?
Yes, strong odors in the microwave can transfer to other foods, potentially affecting their taste. It’s advisable to remove the burnt smell before using the microwave for other foods.
What causes popcorn to burn so easily in the microwave?
Popcorn burns easily due to the rapid heating of the oils and seasonings. If left in the microwave for too long or at a high setting, the kernels can overheat and produce a burnt aroma.
How long should I typically microwave popcorn to avoid burning?
Most popcorn bags recommend a time range, usually around 2-4 minutes. It’s essential to listen for the popping to slow down to about 2 seconds between pops and then stop the device.
The Bottom Line
It’s clear that while burnt popcorn might be a common kitchen foe, but it’s by no means unbeatable. With the right tools, techniques, and a bit of patience, you can restore that fresh, welcoming scent to your microwave. It’s all about understanding the issue, applying the right solutions, and being persistent.
And remember, every misstep is just a learning experience. With these tips in your back pocket, you’re well on your way to mastering the art of perfect popcorn popping.
Related Posts:
- Here's How You Can Get the Best of Celery Juice -…
- 10 Best Over The Range Microwave 2023 - Get More…
- Poor Man's Burnt Ends Recipe 2023: Treat Yourself…
- Different Ways to Use Himalayan Salt Block In Your Kitchen
- How to Reheat Wings in 5 Easy Ways? - Crispy and Delicious
- 4 Easy and Useful Ways on How to Reheat Shrimp -…


